


This is a partnered conversation. All opinions and photographs are my own.
Ever since the release of The New Yiddish Kitchen and the Ditch The Wheat Cookbook the Paleo blogosphere has been all abuzz about BAGELS! While the bagel recipe in each of these cookbooks is incredible, neither is appropriate for the AIP.
Even though it's been over a year since I was able to reintroduce all the foods after coming off AIP and healing my leaky gut, I still have a drive and passion for developing AIP recipes, especially things considered treats. I know how much it SUCKS to feel deprived and limited and just how happy having a special treat can make you feel!
I actually felt kinda guilty about posting my pics of the other bagels on my social media since I know I have so many followers who are AIP. So, I decided I just had to come up with a recipe my followers could eat, too!

Using Gelatin "Eggs"
Back in 2014 when I was strict AIP, I started experimenting with using gelatin as an egg replacer in savory recipes. At that time, there were plenty of blog posts about using things like applesauce, mashed bananas, and pumpkin to replace eggs, but generally those only really work in sweet recipes.
I could only find ONE reference to using gelatin as an egg replacer, and that was on the Foodsubs.com website. I scoured the internet for any recipe using gelatin to replace eggs in baked goods and could find NOTHING. I was the first blogger to share recipes using gelatin eggs and boy did THAT explode in popularity! I love seeing all the amazing creations that other talented bloggers have come up with.
Before I give you the recipe I want to share some info about my favorite gelatin to use for AIP baking.
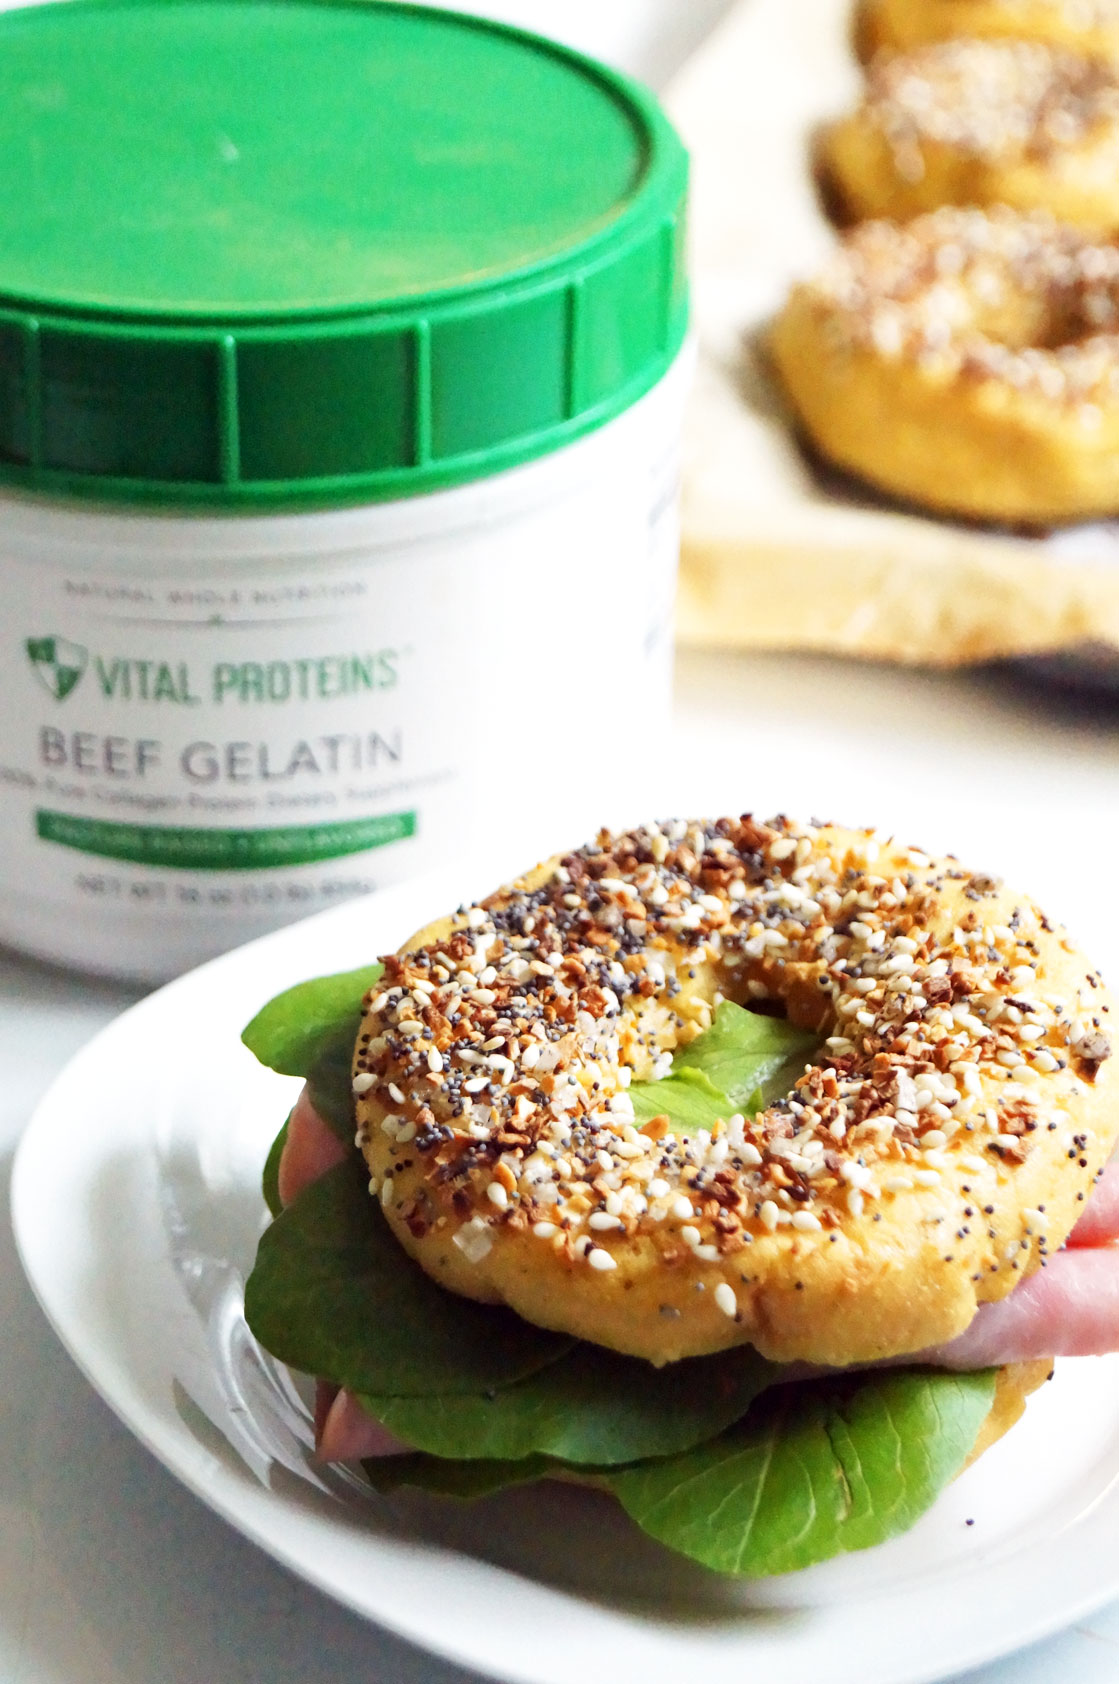
My Favorite Gelatin: Vital Proteins
Like many of you I'm sure, I started out using Great Lakes gelatin. I thought it was the best available on the market when I went Paleo in 2010. Well, last year when I presented at Paleo f(x) I got to meet the folks behind Vital Proteins, a brand I had heard of but didn't know much about. I had a fabulous conversation with them about their products. I also got to taste lemon water infused with their collagen peptides and was blown away at how completely different it was from Great Lakes collagen. I was immediately hooked!
It was smooth, tasteless, and left a faint silky hint on the tongue letting you know the collagen was in there. It had no odor. Now, I've gone through MANY canisters of Great Lakes over the years, and any time I have supplemented with their collagen in plain water I have to choke it down. It has a beefy odor and taste to me and is prone to clumping.
In side by side comparisons at home I've seen Vital Proteins collagen dissolve completely, easily, where the Great Lakes forms some clumps. It is really no contest for me, tasting them side by side. Vital Proteins is absolutely worth the slightly higher price for the better taste and for how easily it dissolves.
I've also noticed that the Vital Proteins beef gelatin has no odor compared to the Great Lakes. I never thought the Great Lakes was a problem, but then when I compared it to Vital Proteins I could really tell the difference. There is less of a beefy overtone in gummies and "Jellos" made with Vital Proteins gelatin, which is awesome.
Another reason why I prefer Vital Proteins over Great Lakes is the packaging. It is super frustrating to try to accurately measure from the Great Lakes canisters, since you cannot scoop a measuring spoon in them. Instead, you have to pour it out of a small hole. This means that to accurately measure, you pour it, sweep it with a knife to make it an even teaspoon or tablespoon or whatever amount you need, then you have to pour the extra back into the tiny hole. It's awkward and frustrating!
Vital Proteins makes it incredibly simple and easy to measure and even provide a scoop with demarcations for both teaspoon and tablespoon! It makes it SO fast, easy, and frustration-free to measure out the amount of gelatin needed. Just unscrew that big lid and you've got easy access to the product. No pouring it out then adding the extra back in. I am actually shocked that Great Lakes has not looked at a package redesign because so many people talk about how frustrating it is.
Vital Proteins Grass-Fed Whey, Beauty Greens, Marine Collagen, and Type II Collagen
Before I get to the bagel recipe, I am SUPER excited to share with you a couple of new products from Vital Proteins AND a giveaway where you can enter to win your own jar of the Beef Gelatin!

Marine Collagen
Vital Proteins marine collagen is derived from sustainably harvested wild-caught snapper. This stuff is incredible! It is a great option for pescatarians or those who otherwise don't eat beef but still want the benefits of collagen. It is a much purer white compared to the beef collagen, and I found it to dissolve instantly in room temperature water without needing stirring. The beef collagen sometimes needs a quick stir with a spoon to dissolve. Compared to the beef collagen it literally has zero flavor whatsoever - my husband and I did a taste test. There is definitely a very slight hint of beefiness with the beef collagen, so if you have an extremely picky eater in your house, go with the marine collagen for a truly taste-free collagen supplement.
Part of why the marine collagen dissolves instantly is due to the fact that it's amino acid profile differs from that of beef collagen. It has a much higher concentration of glycine, meaning you can take less and get the same benefit (a serving is a 12g scoop rather than a 20g scoop of the beef collagen). Glycine is primarily responsible for the health benefits of collagen supplementation (which include benefits to the immune system, digestive system, and nervous system) - learn more about glycine on the Vital Proteins blog here.

Cartilage Collagen Type II Collagen (natural chondroitin sulfate)
Type II cartilage collagen is different than the blue canister collagen (which is types I and III) in that it's derived from different tissues (the trachea, actually) and is a natural source of chondroitin sulfate, which can be helpful for those with arthritis or other joint pain. It comes in convenient pills for easy supplementation. Type II collagen is more beneficial to the joints and bones, whereas type I is more beneficial for the hair, skin, and nails. This is a great addition to the product lineup!

Collagen Beauty Greens
I LOVE THIS STUFF! The Collagen Beauty Greens are a gluten-free blend of the new marine collagen with organic greens, spore probiotics, and hyaluronic acid. I have to say I was super duper skeptical that these would taste good. I mean, greens and powdered coconut water and vanilla? That does not sound like a good flavor combo. I was thinking I would gag this down, but to the contrary I think they taste DELICIOUS! I am incredibly impressed and think this is one of the best tasting and cleanest greens supplements I've ever tried. I also love that they add completely shelf-stable spore probiotics in the form of Bacillus Coagulans.

Collagen Whey
This Cocoa and Coconut Water Collagen Whey is like healthy chocolate milk for adults. I think it is hands down my favorite product from Vital Proteins. Because it is a blend of cold-processed grass-fed whey and collagen, it provides a balanced amino acid profile and contains the branched chain amino acids (BCAAs) needed for post-workout recovery. Plus , like the Beauty Greens, it's got spore probiotics and hyaluronic acid. This stuff feels like an indulgence but it really isn't and I have pleasantly made it a part of my routine after I go for a vigorous walk.
Vital Proteins Gelatin Giveaway
Use this Rafflecopter widget to enter the giveaway. Good luck!!

Ok, now I am done gushing about all the awesome new offerings from Vital Proteins, so let's get to the much-awaited AIP bagel recipe!
AIP Bagel Recipe Tips
I made several variations of recipes and landed on this one as the best AIP version. Straight cassava flour alone does not produce the best texture since there is no yeast. Cutting it with the coconut flour and adding the pumpkin really made both the color and texture so much more appealing, and also makes these good toasted the next day as leftovers (not the case with plain cassava!)
- Cassava flour can be a bit dry and clay-like. Make sure you can roll out the dough into bagel shapes without it cracking too severely. You may need to add water 1/2 TB at a time if it cracks too badly. A few small cracks are OK (see next tip for how to handle those).
- Have a little water in a small bowl handy to smooth out the edges of the bagels before boiling, for a more uniform exterior. Just dip your fingers in and rub the dough to smooth it out.
- SIFT YOUR FLOURS! I just pour mine into my fine strainer over a bowl and shake it side to side. I also strongly recommend measuring by weight rather than volume too, but if you are very careful and sift, scoop, then sweep a knife across the top you should be ok :)
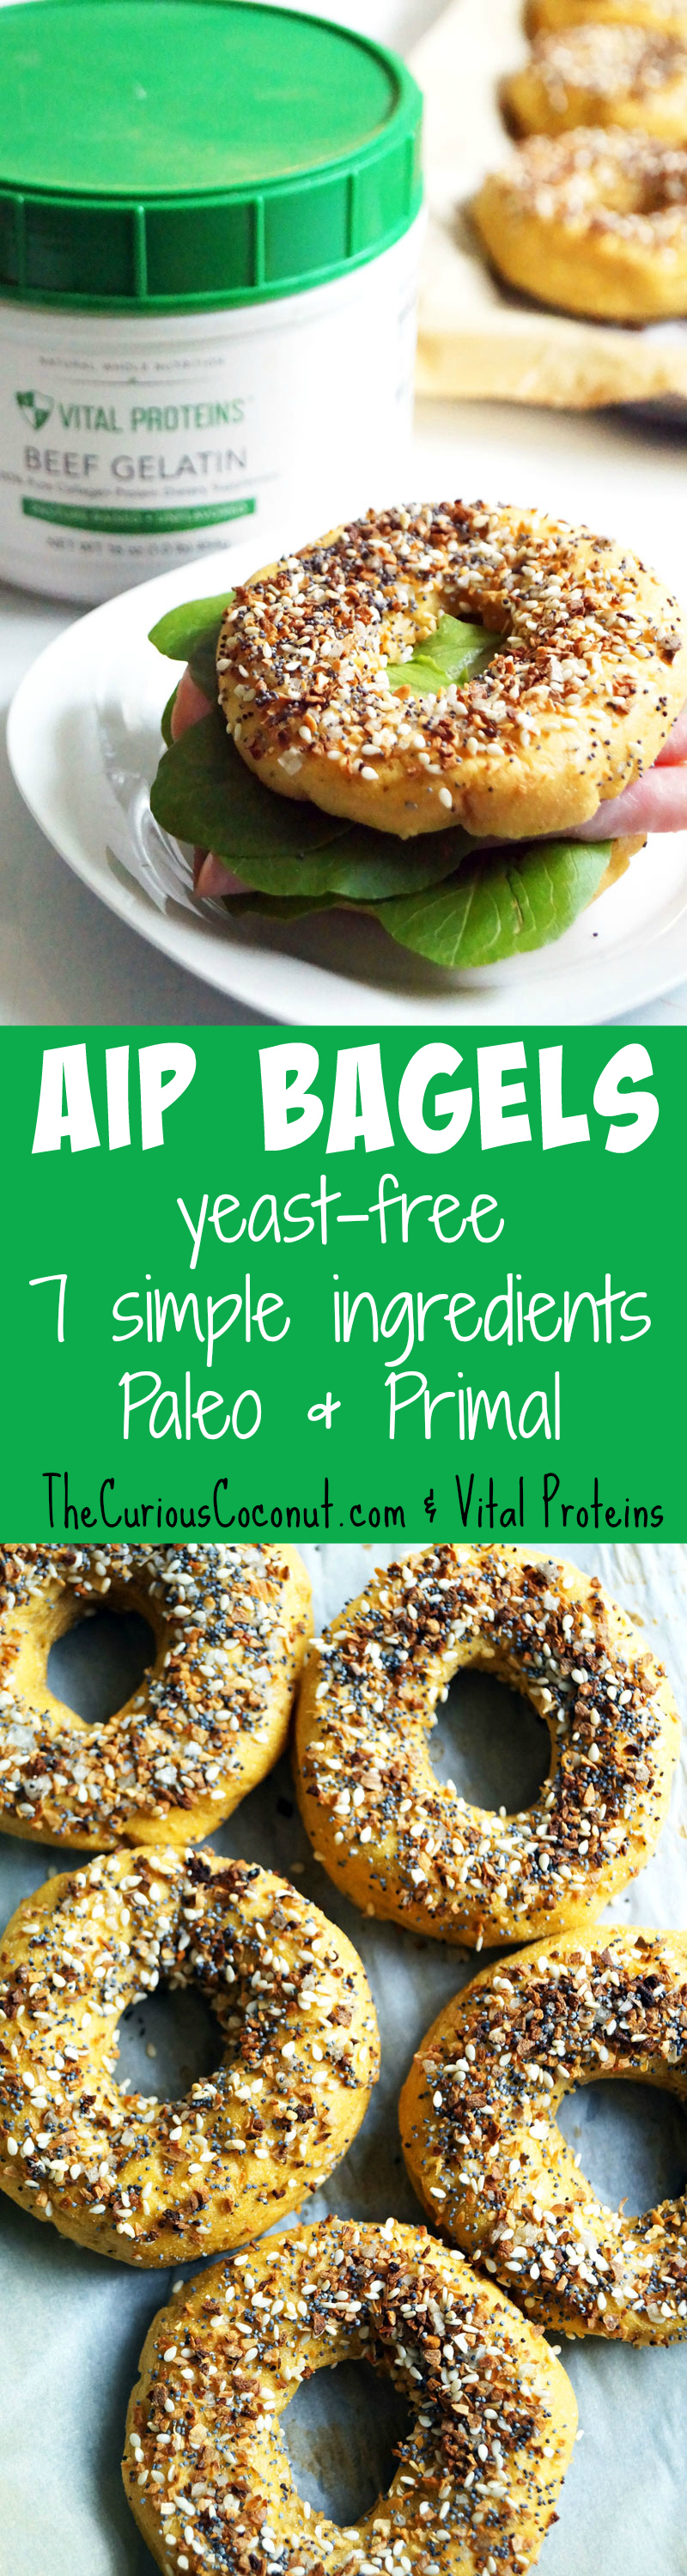
- I photographed these with true "everything" toppings, which include poppy and sesame seeds. Omit these if you are on the strictest elimination phase of AIP and simply use the garlic and onion flakes with a good coarse salt. You won't miss the seeds, they are mainly just there for looks!
- How many bagels should you make? Since these are most definitely a TREAT and not something that should be a daily breakfast staple, don't make the full batch of 6 if you're the only one who will eat them. They are OK the next day if you slice them and reheat in the oven, but really (like a real bagel) they taste best warm out of the oven. It's easy to actually just make a single bagel and not a lot of trouble. I'll give you the amounts so you don't have to do the math!
- What should you put inside? I've made these with simple clean AIP-friendly deli ham and lettuce harvested from my garden. Feel free to use your favorite deli meat (always check ingredients). And of course, a good smoked salmon or lox is always delicious stuffed inside a bagel! I have a dairy-free cream cheese recipe, but it is not AIP as it uses cashews. Perhaps an AIP cream cheese is in my future recipe development!
AIP Bagels with Vital Proteins gelatin
Published 04/22/2016
The wait is over - an AIP bagel that tastes like a real bagel! Thanks to the magic of gelatin, these bagels have a chewy center. My New Yorker husband agrees that these are an amazing breakfast treat!
Yields 6 small bagels or 3 large bagels
Ingredients
- 30 grams (1/4 cup plus 2 TB) sifted coconut flour
- 245 grams (1 and 1/2 cups plus 3 TB) sifted cassava flour
- 3/4 tsp AIP baking powder (make this yourself with 2 parts cream of tartar to 1 part baking soda)
- 1 and 1/4 tsp unrefined finely ground salt
- 6 TB canned pumpkin puree
- 3/4 cup filtered water (you may need an extra 1-2 TB to achieve desired dough consistency)
- 1 TB Vital Proteins beef gelatin
- 2 tsp dried onion flakes
- 2 tsp dried garlic flakes
- 1 tsp coarse salt
- optional: 2 tsp poppy seeds (not for strict AIP)
- optional: 2 tsp white sesame seeds (not for strict AIP)
- 3 slices of your favorite deli meat and some leafy salad greens or microgreens
- A few pieces of smoked salmon or lox
- your favorite dairy-free spread, such as my savory cream cheese (note this is not AIP)
Instructions
- Begin by filling a large-bottomed pot with about 6 inches of water - this is to boil the bagels before baking. Also preheat the oven at this time to 450F. Let the water start heating over high while you prepare the dough. You can always shut it off if it boils before you're ready.
- Next, prepare the gelatin egg. Add the 3/4 cup water to a small pan and sprinkle the gelatin on top to "bloom" it. Do it slowly so that clumps do not form on the surface. Let it sit for 2-3 minutes then heat over medium until all the gelatin dissolves.
- Remember to sift your flours and measure them once they've been sifted! I recommend measuring by weight, but you can do volume too if you are careful. Add the flours, baking powder, and salt to a large mixing bowl and stir to combine.
- Add your prepared gelatin egg and canned pumpkin to the flours and use a spoon to stir initially so that you don't burn yourself from the gelatin. Use your hands to finish forming the dough into a ball. NOTE: you may need to add an extra 1-2 TB of water depending on the texture of the dough.
- Break dough into 3 (for large) or 6 (for small) sections for bagels. Roll them into balls, then into cylinders about 6-8 inches long. Loop them back on themselves to make rings. If they crack excessively then you need to add more water a little at a time. A little cracking is OK, and can be smoothed out by dipping your fingers in water and smoothing the dough over.
- Your pot of water should be boiling by now. Carefully drop the bagels into the pot and start a timer for 90 seconds. I gently nudged the bagels so that they did not stick to the bottom and floated a bit in the water. These won't float all the way on top of the water like normal bagels, but they do float a little!
- Flip them over and boil on the other side for an additional 90 seconds.
- While they are boiling, you can add the topping ingredients to a small bowl and stir to combine. Remember that seeds aren't allowed on the strictest form of AIP so omit the poppy and sesame seeds if necessary.
- Carefully remove the boiled bagels and place them on a light colored baking sheet lined with parchment paper. Sprinkle topings liberally, they will easily stick. Bake for 17-22 minutes.
- Allow to cool on a wire rack about 10-20 minutes before digging in.
- Allow leftovers to cool completely and store on the counter in an air-tight container. Reheat the next day by slicing in half and baking at 350F for about 10 minutes.
- Enjoy will your favorite sandwich fillings, smoked fish, or cream cheese alternative.
Cook time: 00 hrs. 22 mins.
Total time: 32 mins.


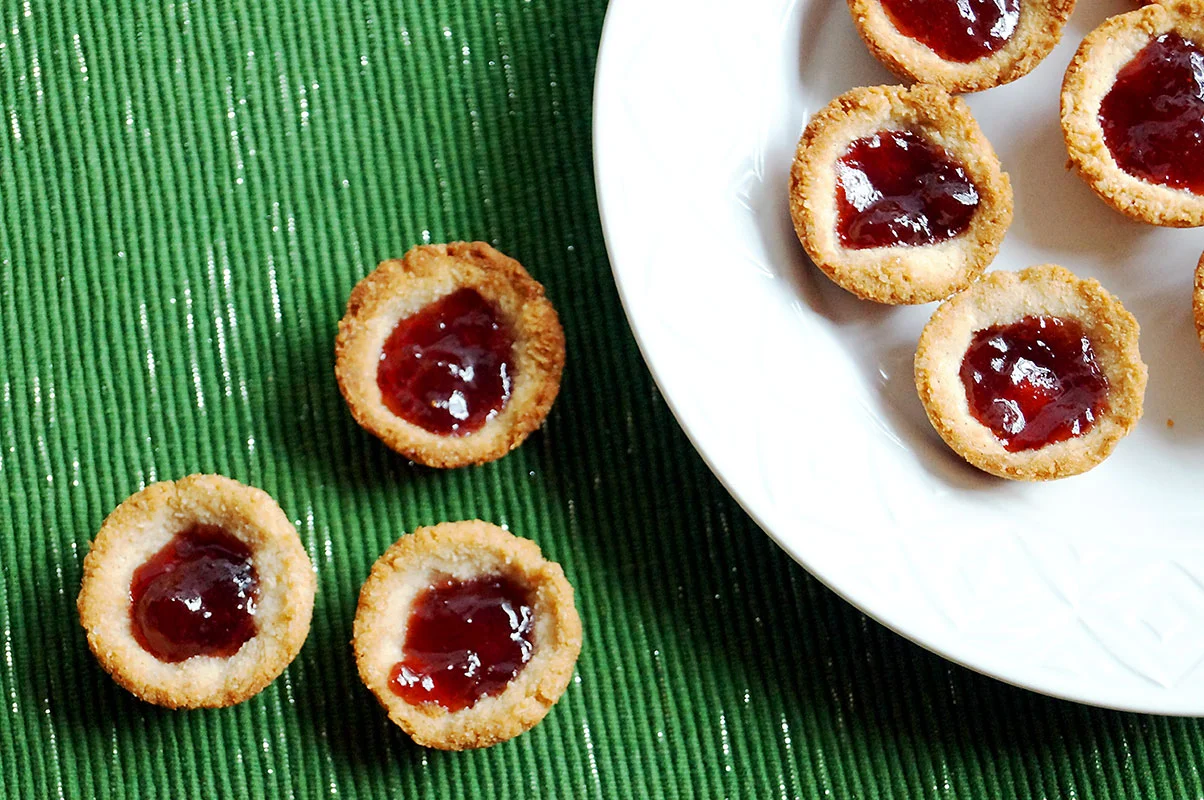


‘Cuppa cuppa sticka’ peach cobbler is a classic southern summer dessert, made allergen-friendly and suitable for gluten-free, Paleo, AIP, and vegan diets. You won’t miss the dairy and gluten one bit in this delectable treat.