

My household goes through a LOT of bone broth every month. Depending on the season, it can be a few quarts or a few gallons. I used to rely on my handy dandy slow cooker for all my bone broth needs and would sometimes find myself running it basically nonstop for weeks on end to keep up with the demand.
Honestly, it got annoying to have it running so often, especially in the summer (it DOES heat up the kitchen). It was especially frustrating when I lived in Miami Beach and had a kitchen the size of a typical master bedroom closet (I'm not even exaggerating!) in our tiny condo and had to take up my already non-existent counter space with the slow cooker continuously.
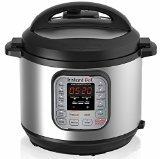
Then, I got an Instant Pot countertop pressure cooker and my life was changed. I can now make the amount of broth that would've taken me a week or 10 days in my slow cooker in a long afternoon. SERIOUSLY. And it will reliably gel every time, even with bones reused 4 or even 5 times.
I was in awe the first time I used my IP to make bone broth. The time savings are incredible and it also prevents heating up the kitchen the way a slow cooker does in the hot summer months.
Homemade bone broth is a great way to get some extra collagen and gelatin in your diet, and if you'd like to learn more about the benefits of gelatin, collagen, and broth, be sure to check out The Gelatin Secret. It is my most used eBook ever! And if you're looking to purchase gelatin or collagen, I recommend Vital Proteins (read why in this post).
Tips for making broth in the Instant Pot
Really pack in the bones. Get creative and play Tetris with them to get as many as possible in there. Fill in any empty spaces with bones. Be mindful though of the max fill level in the pot!
Use enough water to just cover the bones. You want to use as little water as possible to ensure a thick, rich, gelled broth every time. I only let the water go about half an inch above the bones.
For beef broth: I find that including neck bones with meat attached give me the best quality broth. I also save every bone from every roast, ribs, or steak that I cook. I have a big zip top baggie labeled in the freezer that I add to over time.
For pork broth: There's nothing like pig's feet to make the most gelatinous, rich broth! Ask your local farmer for the feet and you may be able to get them for free (it's happened to me before!) or dirt cheap, like $1-2 a pound.
Like with beef, I save all the bones from chops, ribs, and roasts and before I know it I've got enough for a batch. Of course you can also buy soup bones from your farmer, too!
For poultry broth (chicken, turkey, duck, etc.): SAVE THOSE CARCASSES! Whenever you roast a bird, save all the bones, joints, extra skin, and the frame. I break down the frames before freezing so that it's easier to cram the bones into the IP.
And like pork broth, chicken feet are AMAZING for broth. I also put chicken heads in mine whenever I get my hands on some. Also: SKIN is awesome for helping the broth to gel. When I roast birds, usually the skin on the back doesn't get super crispy, so instead of eating it I save it and include it in my broth.

How many times can you reuse bones for broth?
It depends on the type of bones you are using, whether they were previously cooked before being used for broth, and the exact makeup of your bones/skin/meat/joints. Here's my experience to give you a rough guide:
beef bones hold up to the most reuses (I've used them 6 times)
lamb/goat/pork are very sturdy too, depending on the specific bones and are good for 3 to 5 batches
poultry bones are the most fragile and are good for 2-3, maybe 4 batches. By 3 chicken bones will crumble easily in your hands, but you can keep reusing them if you want. I've gotten fully gelled chicken broth from bones in their 5th batch! But I usually stop after 3 these days.
How to store bone broth
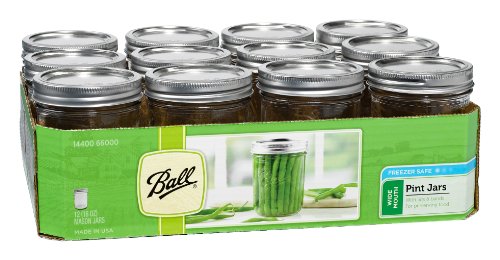
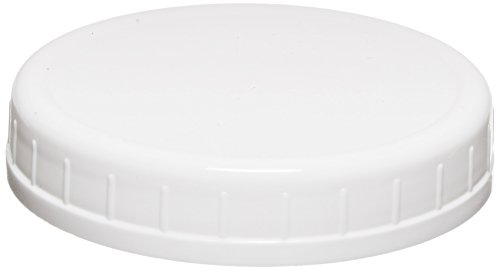
So where do I put all that broth, when I make a few gallons in a day? Easy. In my chest freezer! I use pint sized canning jars fitted with reusable plastic lids (which never touch the broth. The metal lids are NOT meant for reuse so these are necessary).
The up front investment in these items certainly pay for themselves in the long run in savings from buying somebody else's broth. It is EXPENSIVE to buy good, real bone broth. One batch of broth
I do not recommend using plastic bags because in my experience they ALWAYS LEAK when you thaw to use them. It is a huge pain in the patoot to have to find something big enough to fit them in in the fridge while they thaw to catch the leakage.
To make adding the broth to the jars super quick and easy, I also use a wide mouth funnel (designed for jars) and a small fine mesh strainer BUT just today I ordered a new product I saw, that is a strainer BUILT-IN to the funnel!! I can't wait to start using it. And, of course, you need a ladle!


How to make bone broth in the Instant Pot
Published 01/25/2016
Make several batches of ultra rich broth that gels reliably in an afternoon with your Instant Pot pressure cooker!
Ingredients
- bones of your choice (chicken, pork, beef, lamb, goat, turkey, duck) - about 4-5 lbs is the max you can fit in 6 QT Instant Pot. Include feet and, for chicken, heads, if you can get your hands on them for extra rich broth. Neck bones and marrow bones are great and freeze bones from any roasts/chops/steaks/etc. that you cook for broth later. Note: you can use frozen bones, no need to thaw before hand!
- filtered water to cover the bones
Storage note:
Trust me on this: your life will be so much easier if you invest in a package or two of pint-sized freezer-safe canning jars, reusable lids for them, a jar funnel, a strainer, and a good ladle. The initial investment is worth it for the long-term savings and health benefits of homemade broth. (See links above for recommended products)
Instructions
- Pack bones in as tightly as you can. The more bones you have the richer your broth will be.
- Add just enough filtered water to just cover the bones - try not to let the water be more than a half inch above the bones.
- For poultry broth: press the "manual" button and make sure it is set to high pressure and the time is 30 minutes. Make sure the vent is closed.
- For pork, lamb, or goat, set the time to 60 minutes.
- For beef, set the time for 90 minutes.
- You'll to account for about 30 minutes for it to reach cooking pressure. It's fine to use the quick depressurize method by flipping the vent over carefully with a long spoon or with an oven mitt on your hand. (BE CAREFUL NOT TO BURN YOURSELF ON THE HOT STEAM!)
- Use a ladle to drain the broth from the pot. I do not stress about getting every last drop out and just do what I can before refilling for the next batch. Remember to only fill the freezer-safe jars I recommend to the max fill line, which is about an inch below the rim.
- Repeat this process for a total of however many batches you want to make in a day. I recommend 3-4 batches for poultry, 3-5 for lamb/pork/goat, and 4-6 for beef.
- This is a great project for a lazy weekend afternoon when you don't have anywhere to be and can check in on the broth every hour or two. The great thing about the Instant Pot is that it will keep your food warm for up to 24 hours, so if you make two batches and don't want to fool with straining the third, you can leave it until the next day, strain it, and then keep going if you want! Or you can knock it all out in a day.
- NOTE: Make sure you have enough storage containers - I can fill anywhere from 4 to 8 pint sized freezer jars with each batch (it depends on how you pack everything in). I have a LOT of jars that I have collected over the years; make sure you are prepared before beginning! And also ensure that you have the storage space in your freezer. I avoid plastic bags for broth storage because in my experience they always leak when thawing.
Cook time: 00 hrs. 30 mins. to 90 mins. per batch
Total time: 35 mins. to 95 mins. per batch


